Prompt Templates are designed to streamline the process of using the same prompt or sharing a prompt with slight differences. A prompt template is a prompt with placeholders. You can select a prompt template, fill in the placeholders and run the prompt with the model of your choice. This is a great tool if you create a detailed prompt that you plan to use to complete a similar task more than once that may be focused on different content.
Creating Prompt Template
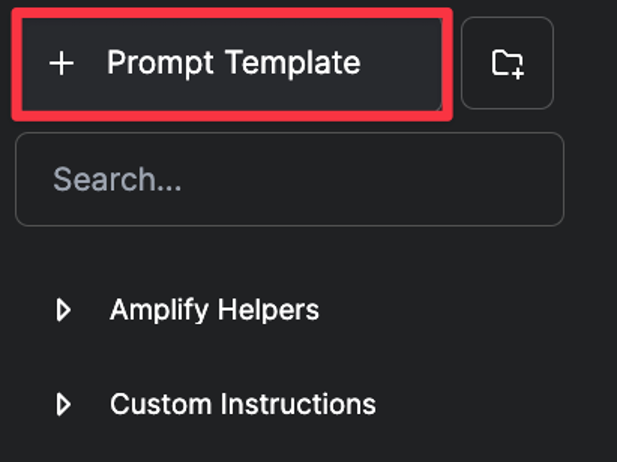
1. Click the “+ Prompt Template” button in the top of the right-hand sidebar. This will allow you to start the process of creating a new Prompt Template.
2. Once you click the + prompt template, a new window will appear requesting information about your prompt.
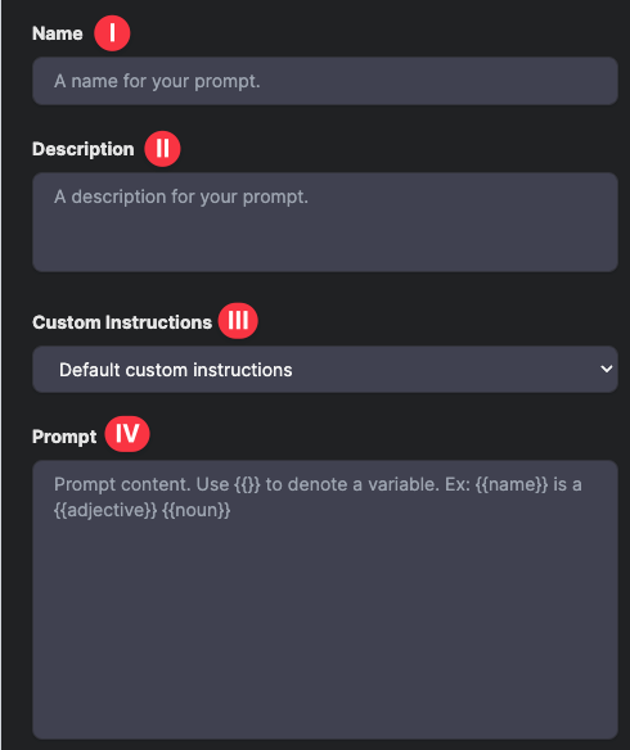
3. Next, you will fill out each of the following fields:
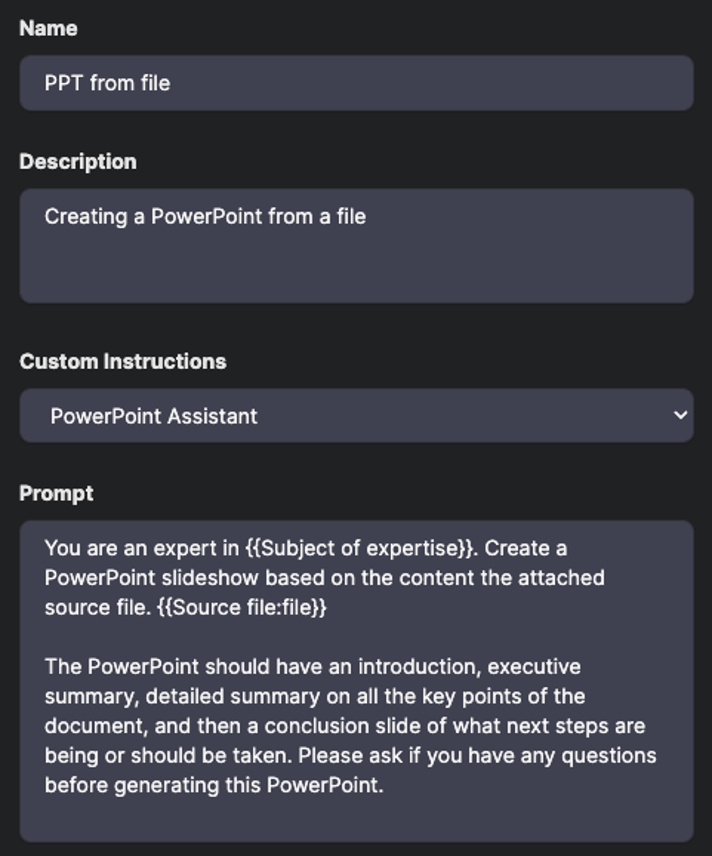
- Name
- Provide the name of the prompt template that you want to be displayed in the right-hand sidebar.
- Description
- Provide a brief description of your prompt template.
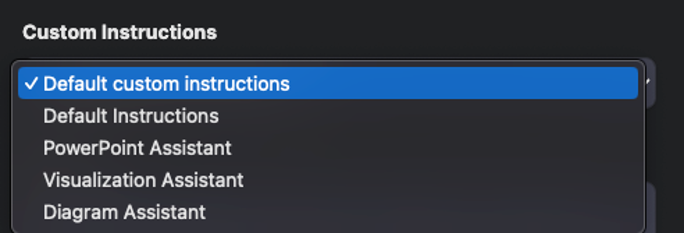
- Custom Instructions
- From the dropdown bar, select either the default instructions or a specific set of Custom Instructions.
- Custom instructions create rules structuring Amplify’s response that will be used and reinforced throughout the entire conversation.
- In contrast, information that you include in the prompt section will be used only once (unless you reuse the prompt within a conversation).
- Prompt
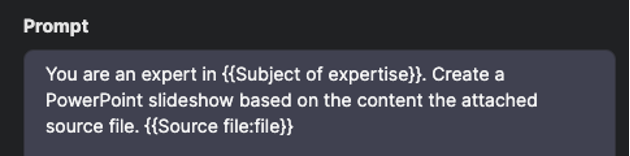
- Provide the prompt that you want to reuse, denoting variables with {{variable}}.
- For example, “You are an expert in {{Subject of expertise}}.”
- Another example is the variable {{Source file:file}}, which allows you to include a file upload as part of your prompt.
- Provide the prompt that you want to reuse, denoting variables with {{variable}}.
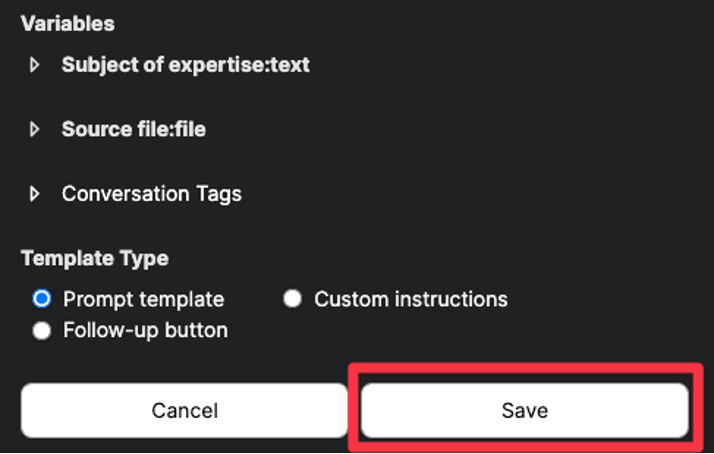
- Once your prompt template is created, any variables you define will appear as places to input information or upload files.
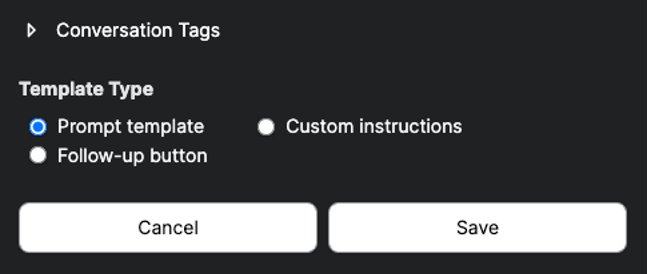
- Template Type
- Prompt template will automatically be selected. To create a prompt template, you do not need to change the template type.
- Note: To learn more about the difference between prompt templates and custom instructions, please visit our FAQ.
- To learn more about creating custom instructions, view our custom instructions guide.
5. Once you have everything entered, review your Prompt Template, then click Save.
Selecting and Using Prompt Templates
Once you have either created Prompt Templates or want to use one of the pre-existing prompt templates, you can do so by following the steps below.
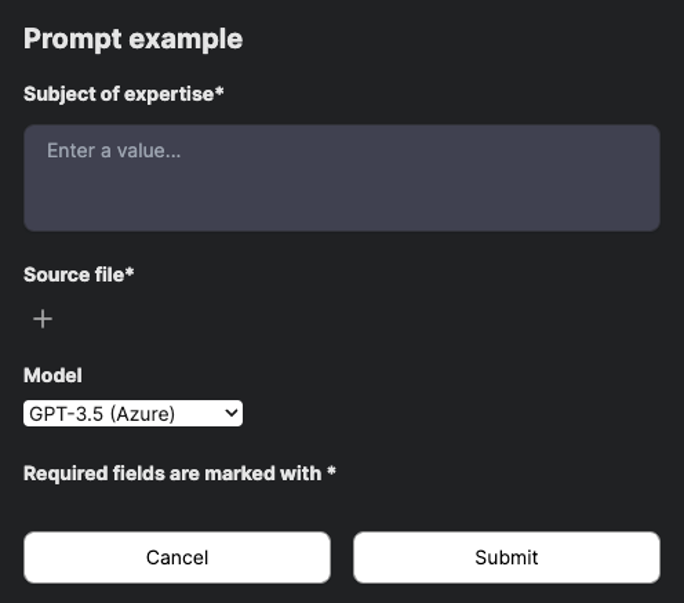
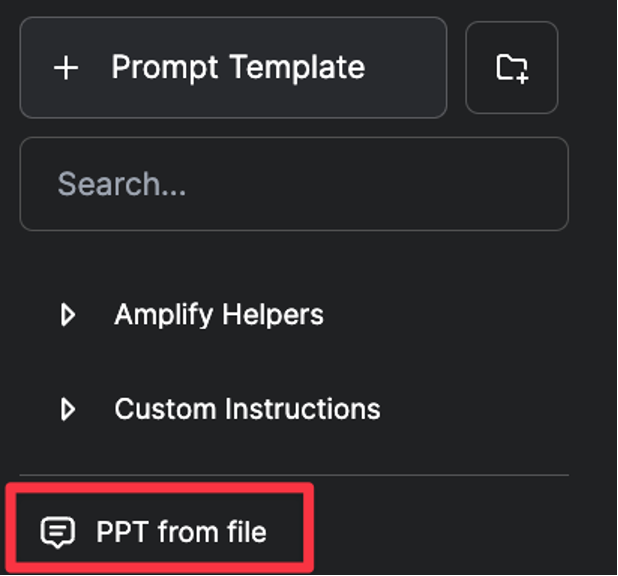
1. Find the Prompt Template you want to use in the right-hand sidebar and click on it.
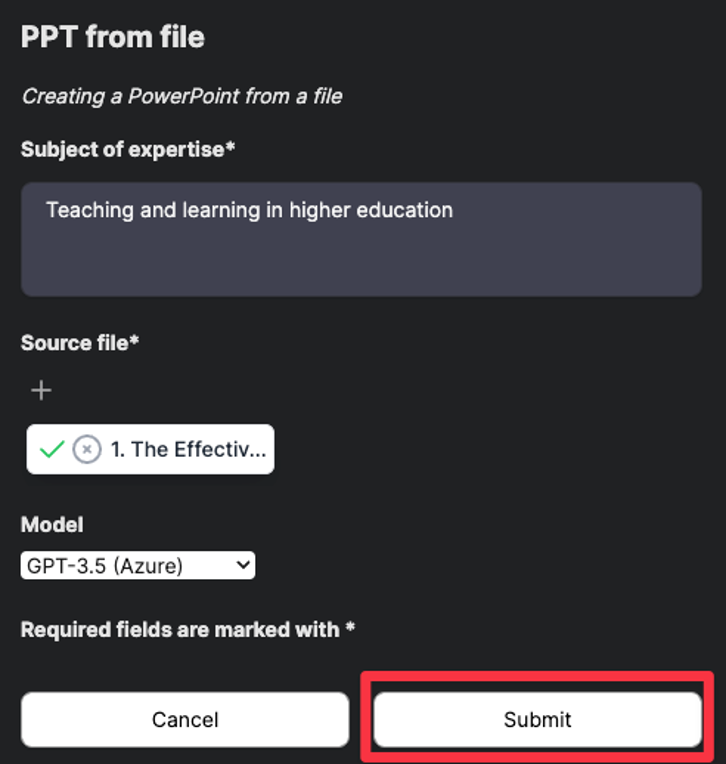
2. In the popup window that appears, fill out each of the fields with the information you would like to add.
- This window will include options like what model to use and fields to define variables created when the Prompt Template was made.
- Example: Here the option to upload a file is present because that variable was added in the Prompt Template during its creation.
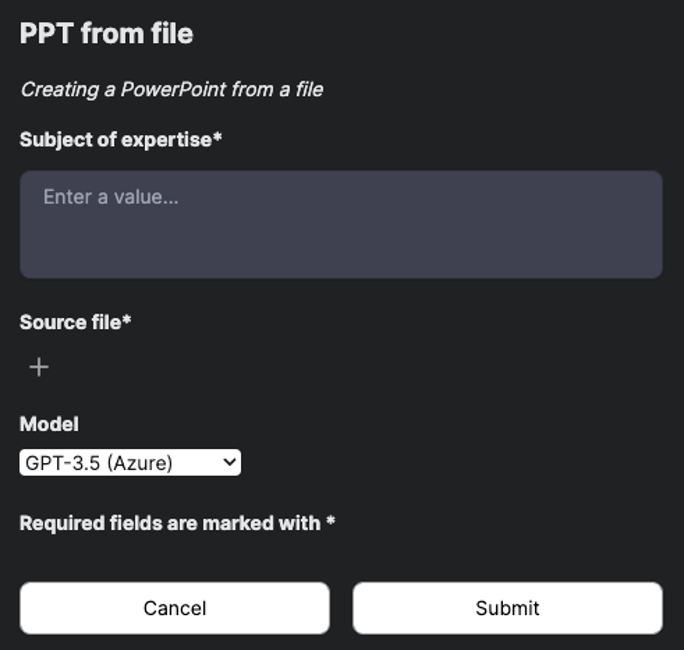
3. Once you have made any selections or selected any variables, click Submit to have Amplify run the prompt as designed.
4. Amplify will then submit the prompt from the prebuilt Prompt Template (complete with any added variables) to the selected model and produce output as it would from any regular prompt.
Sharing Prompt Templates with Others
1. If you want to share Prompt Templates you have built yourself, refer to our guide on Sharing in Amplify.