Quiz Results Displays
Once students have completed a quiz in Brightspace, there are many settings faculty can use to control what information students can and cannot see. These settings can be applied immediately upon student submission, at a later time following the quiz period, or with some combination of both.
Note: These instructions use the new Brightspace Quiz Experience introduced in Fall 2022
Basic Settings for Quiz Results Displays
The settings to determine what students see upon completion of a quiz can be found under the Evaluation and Feedback section of the Brightspace Quiz Editor. Basic settings can be found immediately within this section, including the option to display the students’ numerical scores, as well as the ability to determine which questions students can see following submission.
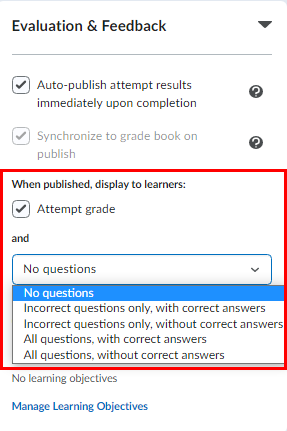
Customizing Quiz Results Displays and Adding Additional Displays
For additional granularity, instructors can select the Customize Quiz Results Display option.
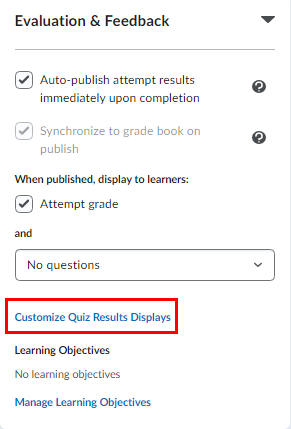
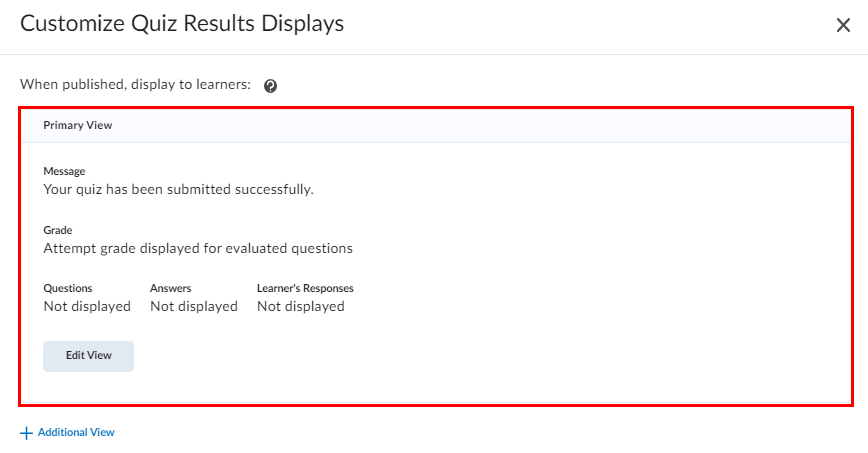
This will open a new window where one can determine not only what a student sees immediately upon quiz submission, but also what they see at set times in the future. The Primary View will always display to learners immediately upon submitting their quiz in Brightspace. This can be edited by selecting the Edit View button.
By selecting the + Additional View option, you can set a submission view which will be visible at a set date and time, or a particular number of minutes after the student completes their quiz. You can also display a custom message, determine whether the student’s grade is shown, and decide which questions students are and are not allowed to view.
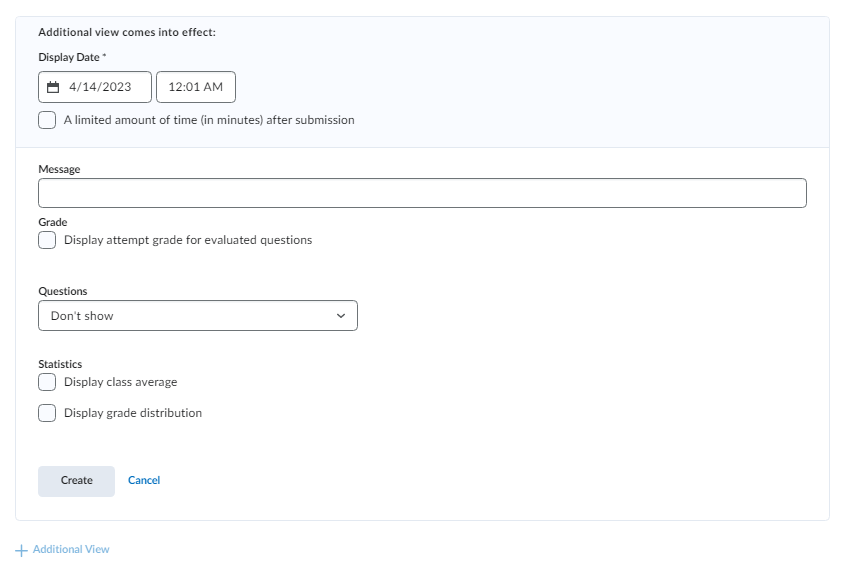
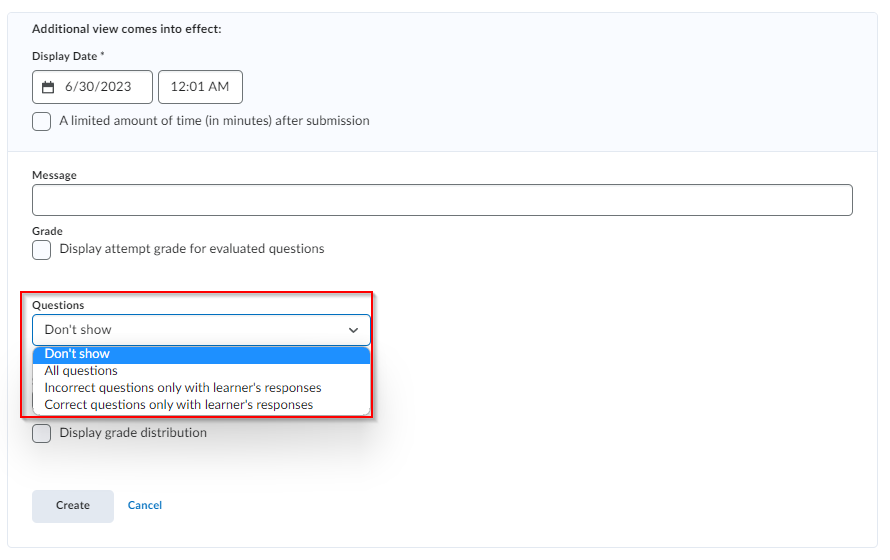
Options for student access to quiz questions include Don’t Show, All Questions, Incorrect Questions only with Learner’s Responses, and Correct Questions only with Learner’s Responses.
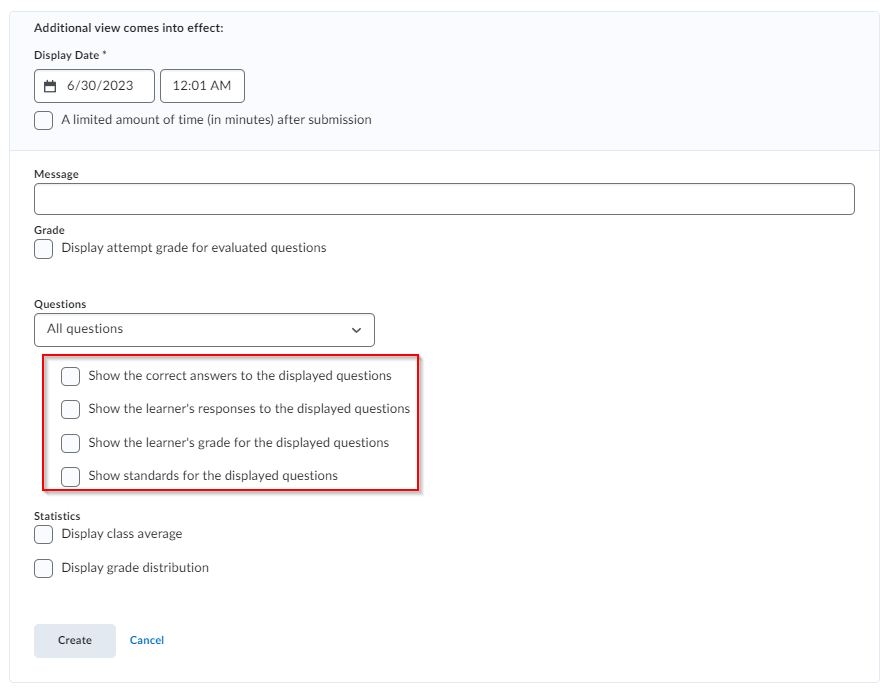
If students are permitted to view some portion of quiz questions, additional options will be presented. These options include the display of correct answers, learner responses, learner grades, and standards.
Choose the Create option to save your changes.

