Creating a Virtual Classroom Session
This guide provides instructions for creating a virtual classroom session in your course. You must create your virtual classroom session ahead of time and assign a date and time for access. You must also link the session to your content area in order for students to see it. Students do not see the Virtual Classroom tab on the Navbar.
Please note: Recorded Virtual Classroom meetings are available only within the course they were created, cannot be downloaded or edited, and are retained for only 14 days. If you would like to retain recordings of these meetings for longer periods, please consider using Kaltura Capture to record your Virtual Classroom meetings.
Create a Virtual Classroom Session
STEP 1: To create a Virtual Classroom session, click on the tool in your Navbar.
If you have not installed Virtual Classroom to your Navbar, here are instructions on how to do that.

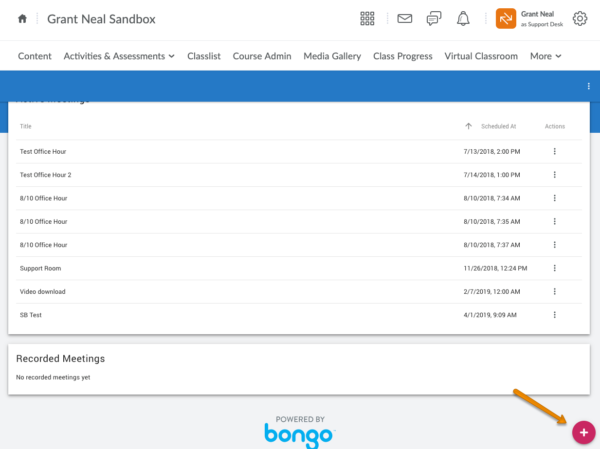
STEP 2: In the bottom right of the following page, click the + button.

STEP 3: In the pop up menu, notice that there is a user limit of 100 in a meeting.

STEP 4: Create the session title and set the meeting date and time. It’s a good practice to open the session 5-10 minutes ahead of time, to allow yourself and students time to join and acclimate themselves to the interface. If the session needs to begin immediately, check the Now checkbox.

STEP 5: Select the desired duration of your session. 90 minutes is the longest session time available.

STEP 6: Select Automatically record meeting if the recording needs to begin as soon as the session starts. Instructors have the ability to stop recording at any time. Select Publish recorded meeting to make the recording available to students once it has been processed (instructors can access the recording regardless of this setting). Select Allow external participants to generate a sharable link that can be provided to people outside of the course. Select Invite entire class to allow all students to access the session (recommended).

STEP 7: Select whether the session needs to repeat weekly. Click Save.
Add the Session to the Content Area
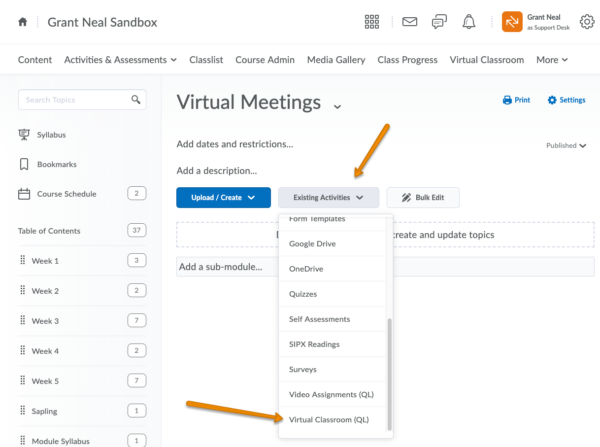
STEP 1: Click Content in the Navbar. In the selected module, click Existing Activities, then Virtual Classroom (QL).
Note: You must place the virtual classroom session somewhere in the Content area for students to be able to access it.

STEP 2: To add your created session, select it from the available list. Additionally, there is a Schedule Meeting button that allows new sessions to be created.

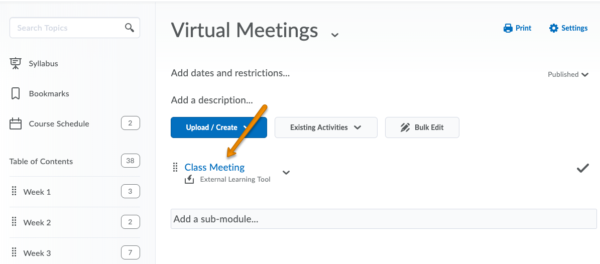
STEP 3: The meeting will now be visible to students in the selected module. It is not necessarily available, depending on your dates and time.

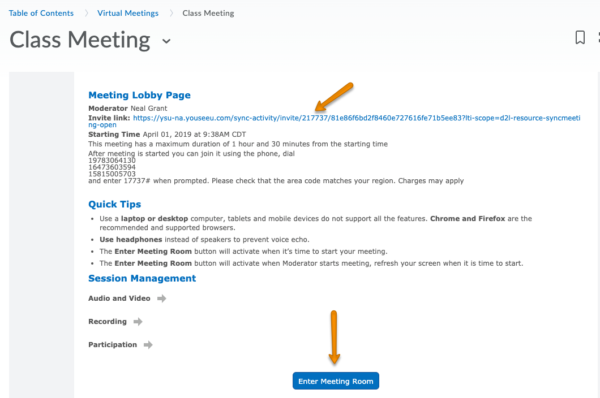
STEP 4: When a user clicks on the link, they will see details about the Virtual Classroom session. An Invite Link is available to the instructor, and can be shared with any external participants if necessary. When the meeting start day/time arrives, you will see an Enter Meeting Room button.


