How to provide feedback using Turnitin
How to provide feedback on student papers using Turnitin
Once inside the Turnitin feedback studio, you can use the blue buttons on the right-side navigation bar to provide electronic feedback to your students.
1. To provide feedback on a paper submitted through Turnitin, first, access the Turnitin feedback studio for the chosen paper. (For help with this step, see “Overview of Turnitin Feedback Studio”)
2. Use the blue buttons on the right-side navigation bar to provide electronic feedback.
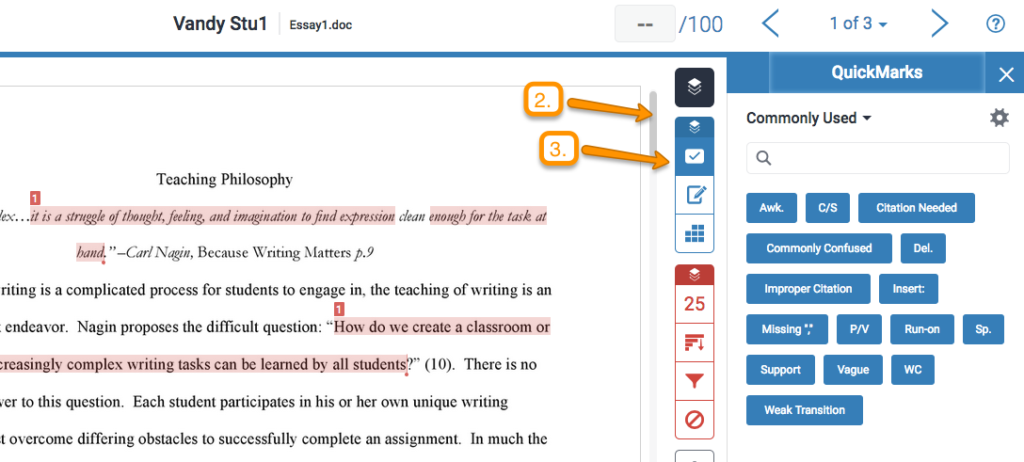
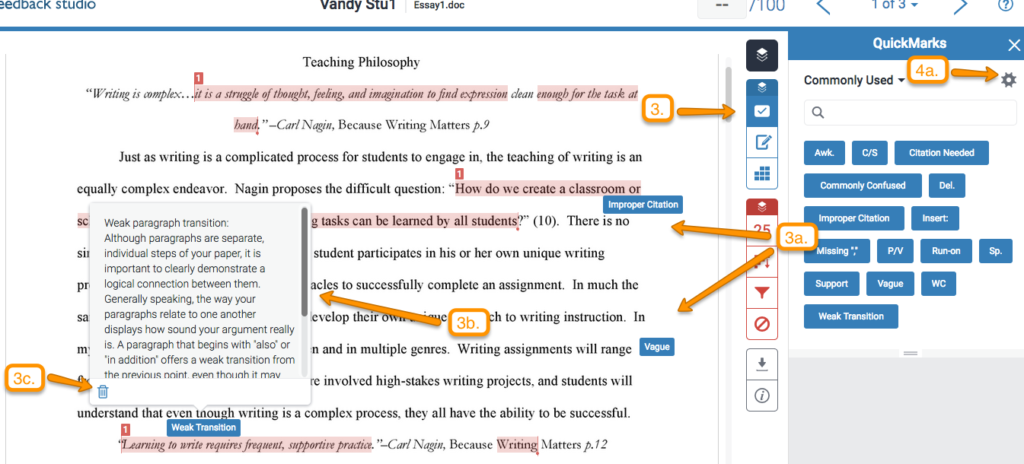
3. The QuickMarks button generates a list of automatic comment bubbles that capture common usage errors.
a. To use these comments, just drag and drop each abbreviated comment to the appropriate sentence in the student’s essay.
b. Students can click on the comment bubble for more information about the error and suggestions for revision.
c. To delete a comment bubble, click on it and then choose the trash can icon in the bottom left-hand corner of the pop-up box.
4. Instructors can also create their own custom comment bubbles. To do this:
a. Click on the settings icon in the upper right-hand corner of the QuickMarks menu, and a pop-up box will appear.
b. To add a new comment, click on the plus sign (+) to the right of the QuickMarks heading and fill in all of the necessary information on the right-hand side of the screen. Then, click save.
c. Alternatively, choose the icon in the left-hand corner of the pop-up box for more advanced options. These include: changing the default comment selections and adding a completely new set of automatic feedback options.
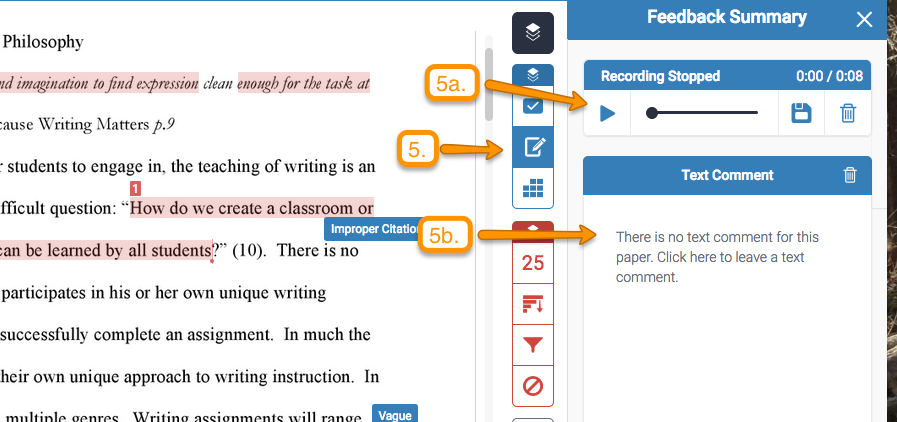
5. The Feedback Summary button allows you to leave more substantial audio and/or textual feedback on a student papers.
a. To record a voice comment, simply click the play button, record up to 3 minutes of audio content, and then click the square stop button. You can then choose replay your comment, delete it, re-record, or click save. (NOTE: You may first be prompted to install Adobe Flash and/or allow Turnitin to access your camera and microphone).
b. To leave textual feedback, simply click anywhere inside the text box and start writing. The text box will allow you to write up to 5000 characters.
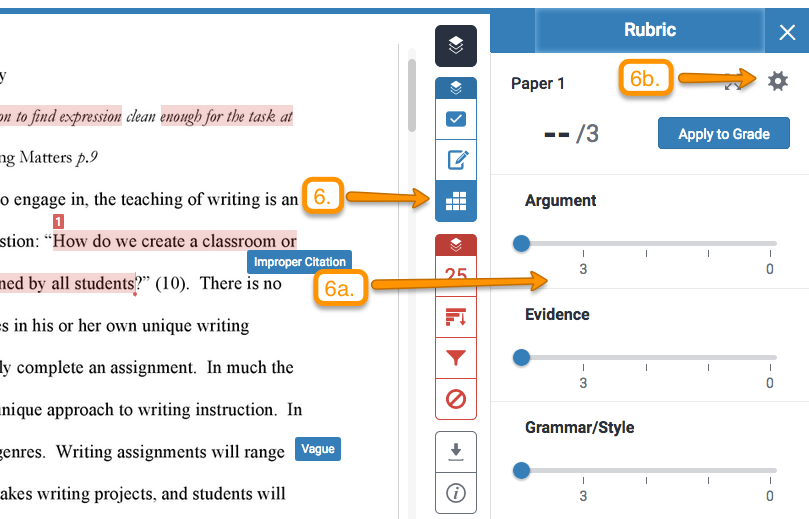
6. The Rubric/Form button button allows you to attach a rubric to the assignment and use that rubric for assigning a grade within Turnitin.
a. If you have already attached a rubric to the assignment, it will automatically appear within the right-hand sidebar.
b. If you still need to attach a rubric to the assignment, click on the manage rubrics and grading forms button in the top right-hand corner of the sidebar.
c. On the next screen a generic rubric will appear. You may choose to update this rubric with your grade information or create a new rubric.
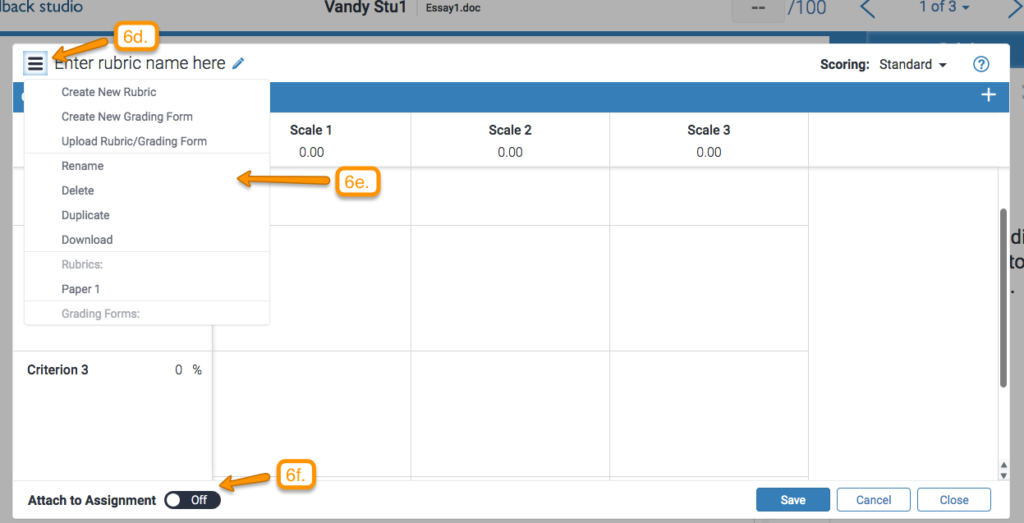
d. To create a new rubric, click on the menu button in the top left-hand corner of the manage rubrics and grading forms screen.
e. From the dropdown menu, you may choose to create a new rubric, a new grading form, upload an existing rubric or form, or pull from previously utilized assessment materials.
f. After creating or uploading a new rubric, be sure to click save and use the switch in the bottom left-hand corner of the screen to attach that rubric to the assignment.
