Please Note
This portal is initially considered a “beta” service as it represents a completely new way for our users to interact with the cluster. Any user feedback is appreciated, so please open a helpdesk ticket if you encounter difficulties or have suggestions.
Accessing the Portal
The portal is accessed through any modern, up-to-date web browser at https://portal.accre.vanderbilt.edu. This address will redirect you to keycloak.accre.vanderbilt.edu where you can enter your ACCRE cluster username and password (not your VUNetID password) to access your account, and redirect you back to portal.accre.vanderbilt.edu.
Be careful that this is your primary cluster credential and must be kept secure. Do not attempt to log into the portal from untrusted machines or browsers that are not fully up to date. Do not enter your ACCRE password into a site that is not keycloak.accre.vanderbilt.edu and does not offer a valid certificate.
Always remember to promptly sign out when you have completed your session or are away from your desk. Signing out of the portal will not affect any running jobs or interactive desktops – these will still be running when you sign back in.
The File Explorer

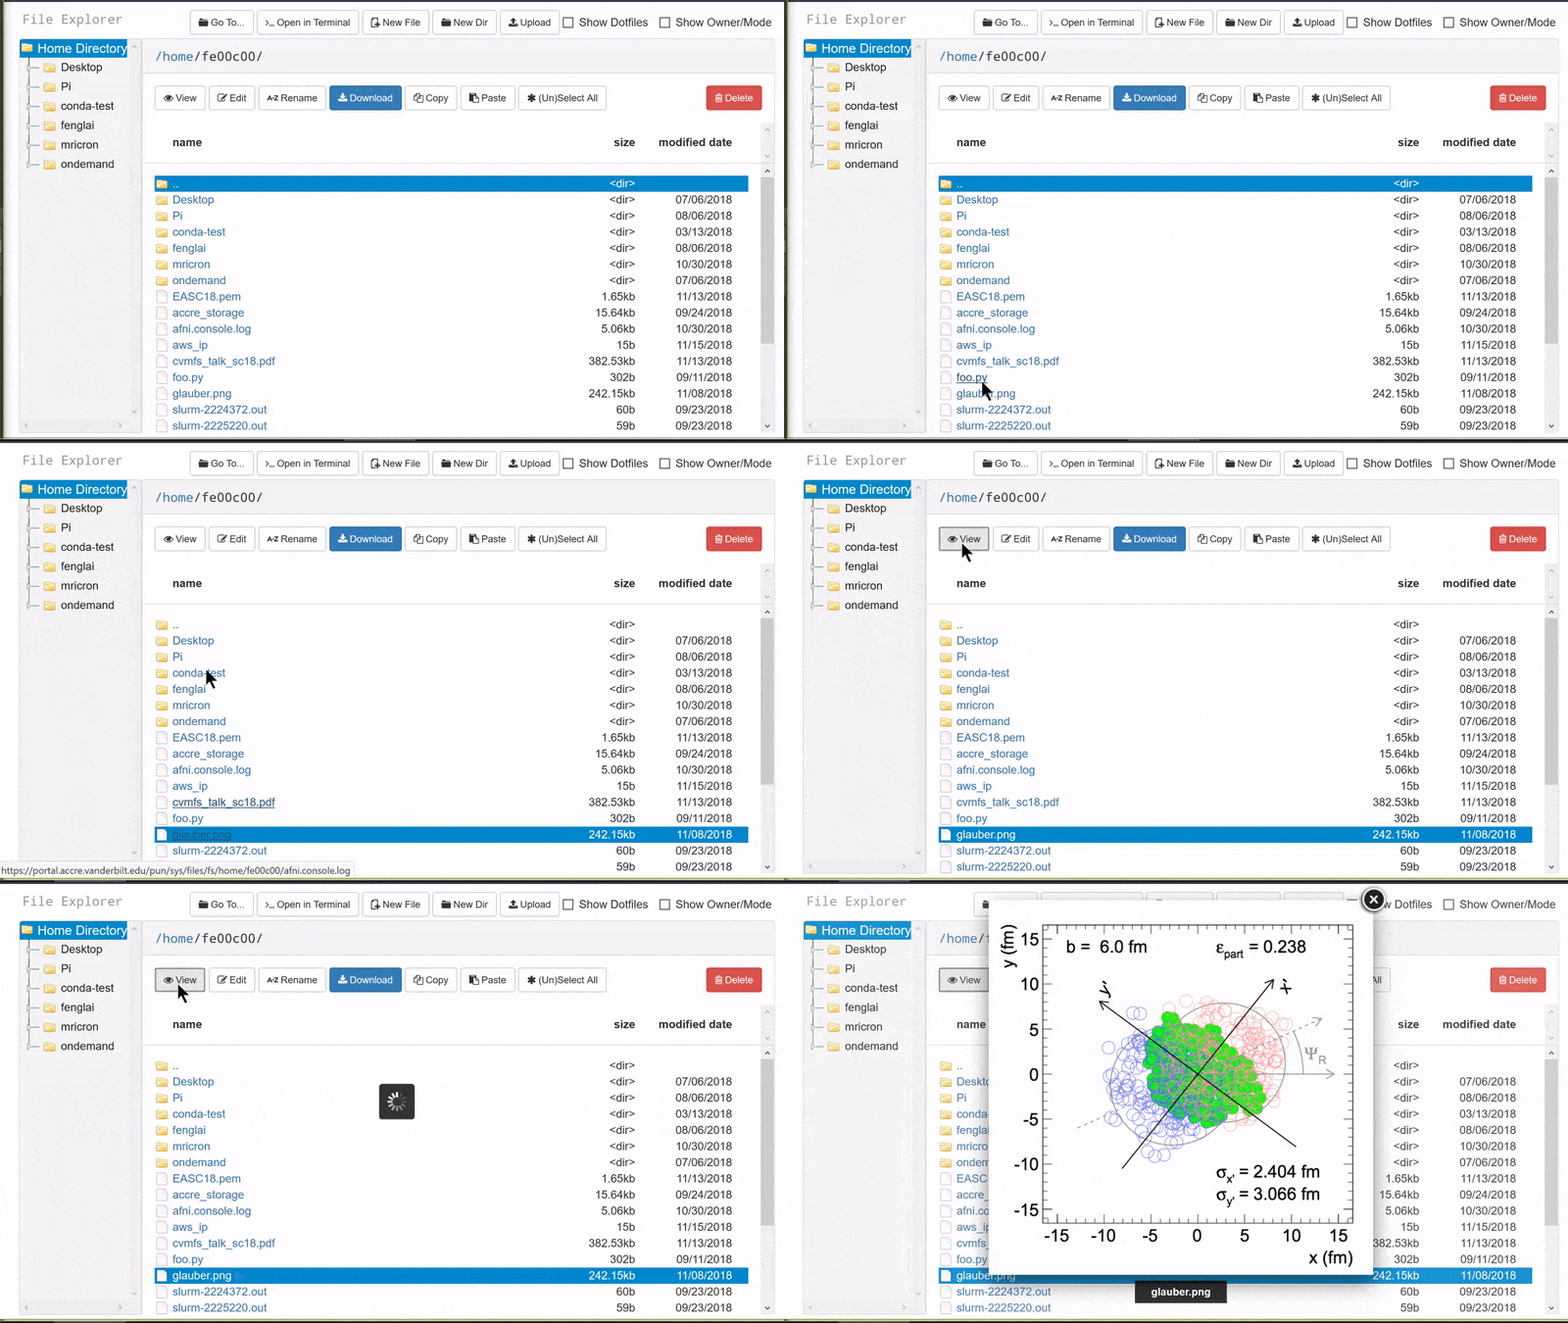
Clicking on the “Home Directory” item in the “files” menu will take you to the file explorer application. This application allows you to browse your directory tree, and securely upload and download files to your workstation. You can view text files as well as standard image formats such as JPG and PNG in the browser window.
The file explorer will also allow you to edit files with the ACE text editor. This modern editor provides syntax highlighting for most languages, automatic indentation, and a number of other features designed with software development in mind.
Gateway Shell Access
Under the “clusters” menu, the “Shell Access” item will open a tab with a typical ssh login to a gateway node, only through your web browser rather than through any software installed on your workstation.
ACCRE Desktops

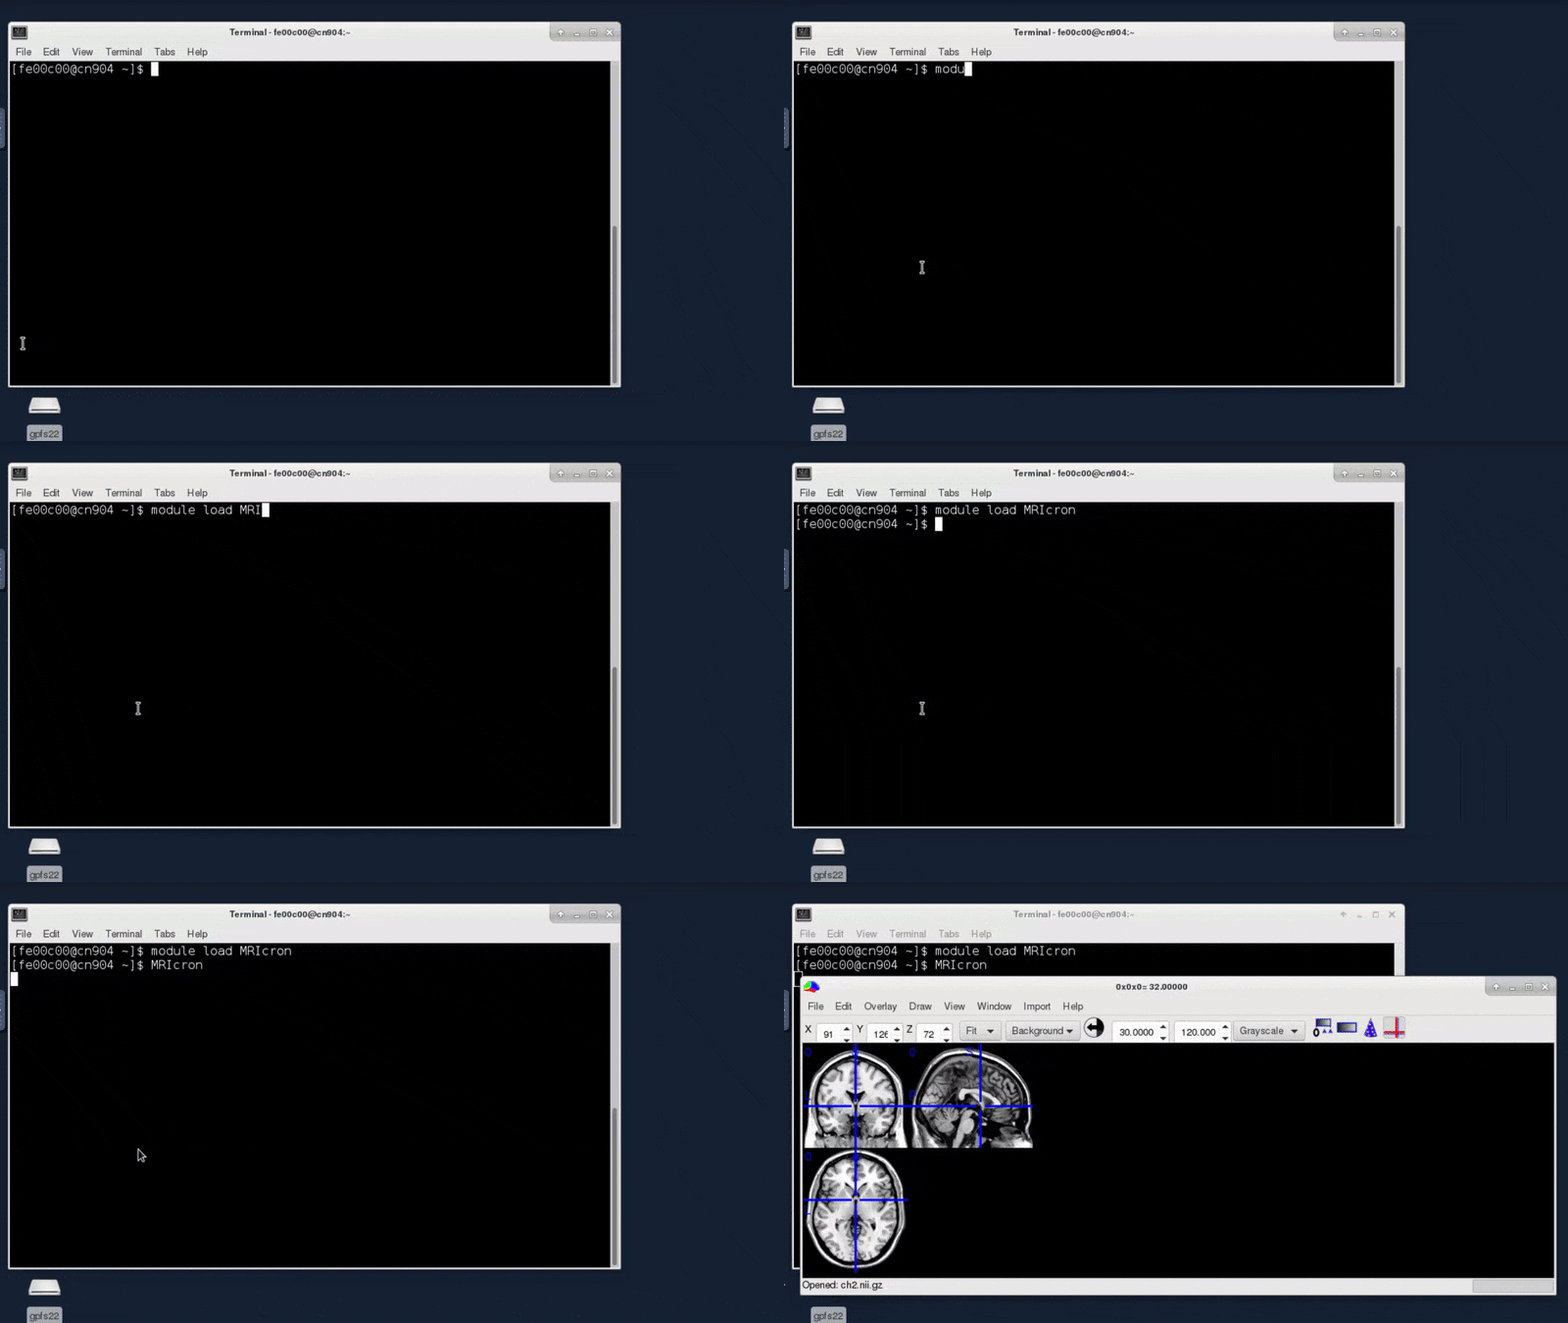
Under the “Interactive Apps” menu the “ACCRE Desktop” item will open a tab where you can request a temporary desktop on a compute node to do interactive, graphical work with applications such as MATLAB or Python Matplotlib. Request the resources you need in terms of CPU cores, memory, and wall-clock time, just as a regular batch job. The resource request is processed just like any normal job, so it may have to wait in the queue until resources are ready. Once ready, you will see an entry for your desktop if you click the “My Interactive Sessions” link in the top navigation bar. There will be a link to open the desktop in a new tab and another sharable link to access the desktop in view-only mode, so that you can screen share with collaborators.
Since the desktop request is handled as a normal batch job, we recommend requesting a desktop 24 hours in advance if possible and requesting anywhere from a few days to a week. The desktop will remain active when you close your browser tab or log out from the portal. It will only be deleted when you request deletion from the portal or press the “log out” button from within the desktop, or when time expires.
When you create a desktop, you set the initial screen resolution. You can click the “reset resolution” button will set the size to that of your browser window. If you would prefer for the desktop resolution to rescale to your display, you can fix this from within the desktop. Click on the NoVNC tab that is partially hidden on the far left of the desktop window to bring it out. Then click on the gear icon to access settings. Change the “Scaling Mode” to “Remote Resizing” to make the desktop screen resize to your browser window. Note that resizing the desktop may cause some software packages such as MATLAB to report errors, which is why this is turned off by default. If your desktop is larger than your current browser window, you may move around the desktop by clicking on the hand icon in the NoVNC tab and dragging the desktop around within your browser window.
Jupyter Notebooks

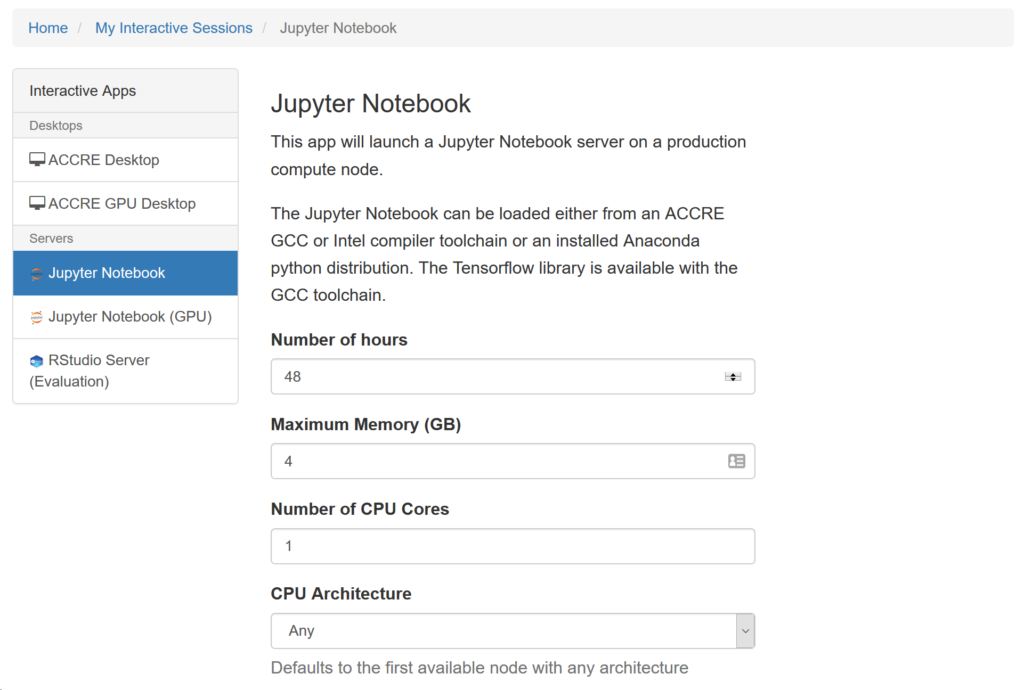
Under the “Interactive Apps” menu, the “Jupyter Notebook” item will open a tab where you can request a Jupyter notebook on a compute node to run notebooks with Python, R, or Octave kernels. You can select the version of Python and/or R and Octave available through Lmod for your notebook, and any additional compatible modules for additional libraries that are compatible with the chosen version will also be loaded. You must also specify the working directory for your notebook, which may be your home directory or another directory that you specify. As with the interactive desktop, the way this works is that you only request the resources you need in terms of CPU cores, memory, and wall-clock time, just as a regular batch job. The job may have to wait in the queue until resources are ready. Once ready, you will see an entry for your notebook server if you click the “My Interactive Sessions” link in the top navigation bar. There will be a link to open a notebook session in a new tab.
We recommend requesting a notebook 24 hours in advance if possible and requesting anywhere from a few days to a week. The notebook server and any running kernels will remain active when you close your browser tab or log out from the portal. It will only be deleted when you request deletion from the portal or when time expires.
Python virtual environments are also supported. For more information on the use of virtual environments and Python on the ACCRE cluster, see the Python documentation page.
